Requirements
Photo Uploader requires Salesforce with the ability to access the Accounts, Contacts, and Leads standard objects. Typically this is available if you have the Enterprise Edition, Unlimited Edition, or Developer Editions of Salesforce.
Installation
If you have not installed Photo Uploader, head over to the AppExchange and download it today.
Post Installation Steps
Put faces to names and elevate your team’s connection to clients, partners and prospects. Use the following instructions to get you started moving in the right direction.
1. Install A Lightning Component
Photo Uploader can be installed within any standard or custom objects however within Accounts, Contacts and Leads you’ll be able to put a face to each name within your org.
1.1 Find the Object you Want to use With Photo Uploader
In our example, will be heading over to the Contacts object page to add our Lightning component.
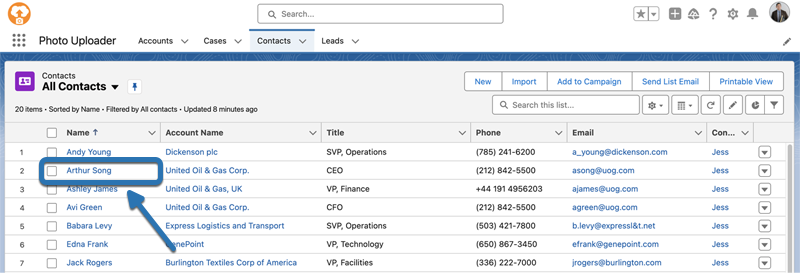
1.2 Edit the Record Page
Will need to head over to the Lighting App Builder within this object to add the Photo uploader component.

1.3 Locate the Component
Use the search box or scroll down until you find Photo Uploader within the “Custom - Managed” components.
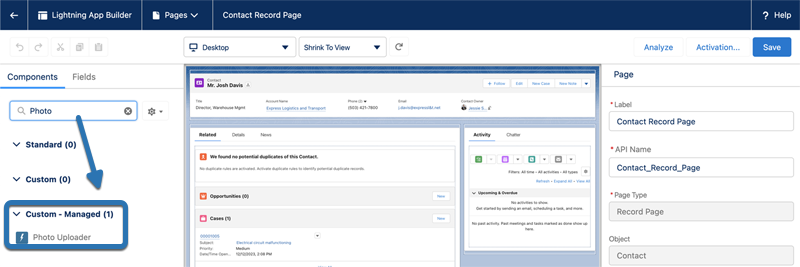
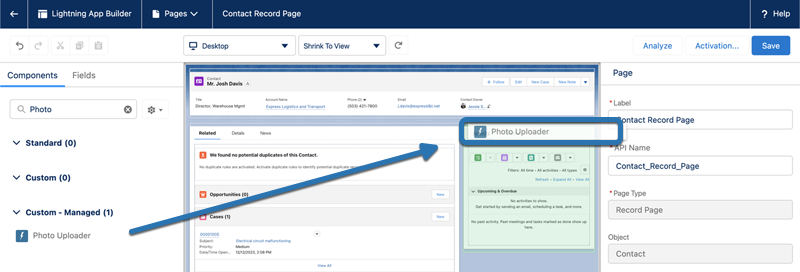
1.4 Drag the Component to the Page Layout
Hover within the page and place the component within any safe areas available.
2. Activate Lightning Component
You’ll need to activate the component before it appears within your object page. The next steps will help you complete the process.
2.1 Click on the Activation Button to Begin
Follow the next screens to complete the activation process.

2.2 Assign as Org Default
Click the “Assign as Org Default” button.
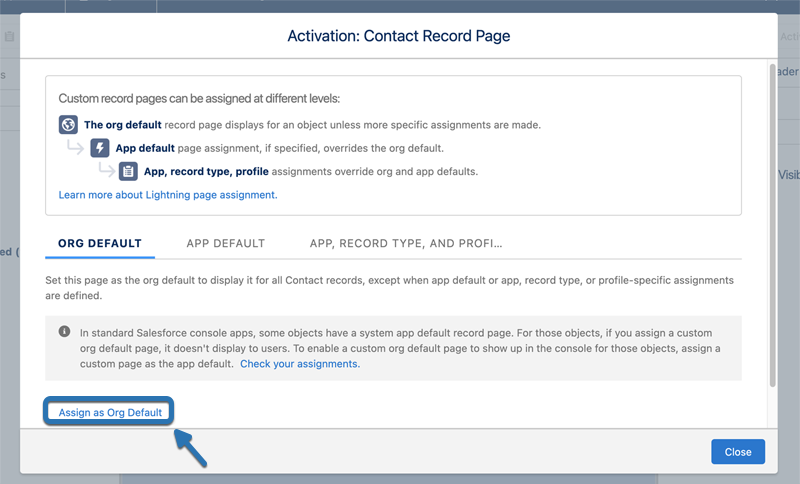
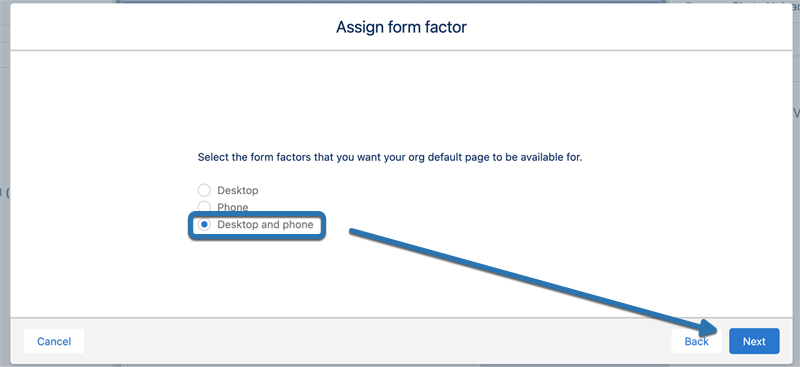
2.3 Assign Form Factor
Select “Desktop and phone” then click “Next” to proceed.
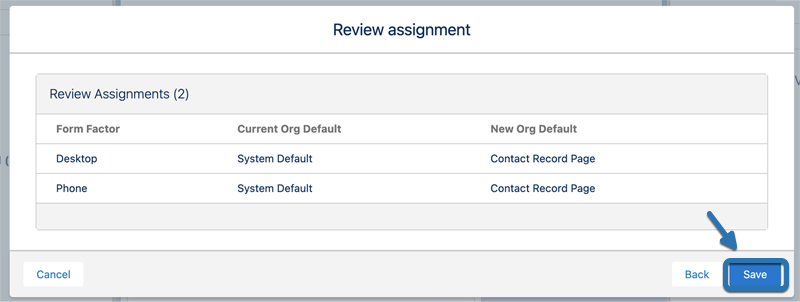
2.4 Review Assignment
Confirm assignments and click on “Save” to complete.
2.5 Save Component Layout
Now click on “Save” and then the “back arrow” to return back to the record page.

3. Test Photo Uploader Component
Now that you have a component installed we can proceed to use it and make sure everything is working as intended.
3.1 Verify Component Appears on the Record Page
Once you saved the page layout you’ll be sent back to the record page from where you first started. This time around you will have a Photo Uploader component ready to use within the record page.

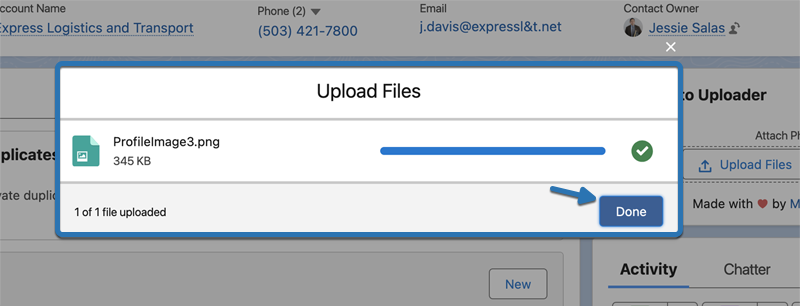
3.2 Upload Image
Either drag-and-drop or upload an image directly to the component. A prompt that shows the file upload is complete will appear, click “Done” to finish.
3.3 Add a Face to a Name
Now your image will be added to this record to access at any time.

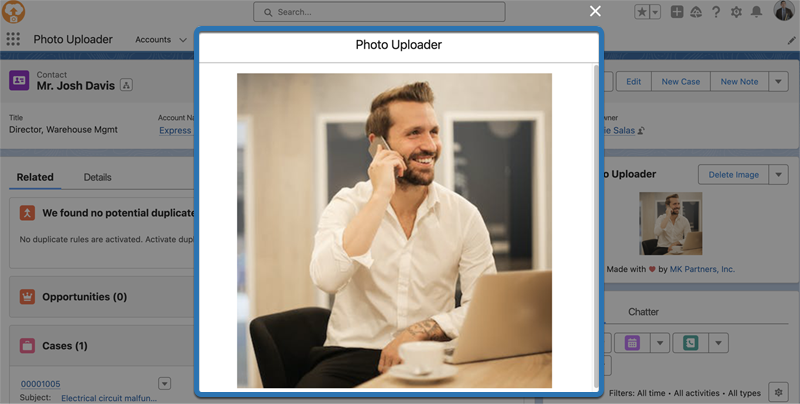
3.4 Personalize Your CRM
Simply click on the image to enlarge it for a closer look.
Share Your Experience With Us
If Photo Uploader is helping your organization connect with your clients, customers or prospects we hope you would be kind enough to share that experience with others. Head over to the AppExchange and leave us know your positive sentiment.
On the other hand if you have feedback or ideas you wish to pass on to the Dev or Support teams we’d love to hear from you. Email us at support@photouploader.app